This is a chapter from the book Functional Kotlin. You can find it on LeanPub or Amazon. It is also available as a course.
There is a trend in programming: we like to move different kinds of definitions into the codebase. A well-known example is a build-tool configuration. It used to be standard practice to write such configurations in XML in build tools like Ant or Maven. Gradle, which can be considered a successor of Maven, defines its configuration in code. The
build.gradle files that you might have seen in projects are just Groovy code:// build.gradle // Groovy plugins { id 'java' } dependencies { implementation 'org.jetbrains.kotlin:kotlin-stdlib-jdk8' implementation "org.jb.ktx:kotlinx-coroutines-core:1.6.0" testImplementation "io.mockk:mockk:1.12.1" testImplementation "org.junit.j:junit-jupiter-api:5.8.2" testRuntimeOnly "org.junit.j:junit-jupiter-engine:5.8.2" }
Some dependencies are shortened to match book width.
Defining configurations in code makes working with them more convenient. First, this kind of environment is known to developers, so they know what they can and cannot do. It is possible to define helper functions, classes, use lambda expressions etc. However, Gradle was not completely satisfied with Groovy: it is too dynamic, suggestions practically don't work, and we often have no information about typos. These are the reasons why the new approach to define Gradle configurations is to use Kotlin:
// build.gradle.kts
// Kotlin
plugins {
    java
}

dependencies {
    implementation(kotlin("stdlib"))
    implementation("org.jb.ktx:kotlinx-coroutines-core:1.6.0")
    testImplementation("io.mockk:mockk:1.12.1")
    testImplementation("org.junit.j:junit-jupiter-api:5.8.2")
    testRuntimeOnly("org.junit.j:junit-jupiter-engine:5.8.2")
}
In this chapter we will learn about the features that are used in the above code. When we write this code, at every point we can use concrete structures that were defined by the designer of this configuration API. This is why it is called a Domain Specific Language (DSL): creators define a small language that is specifically designed to describe something concrete using code, which in this case is a Gradle configuration.
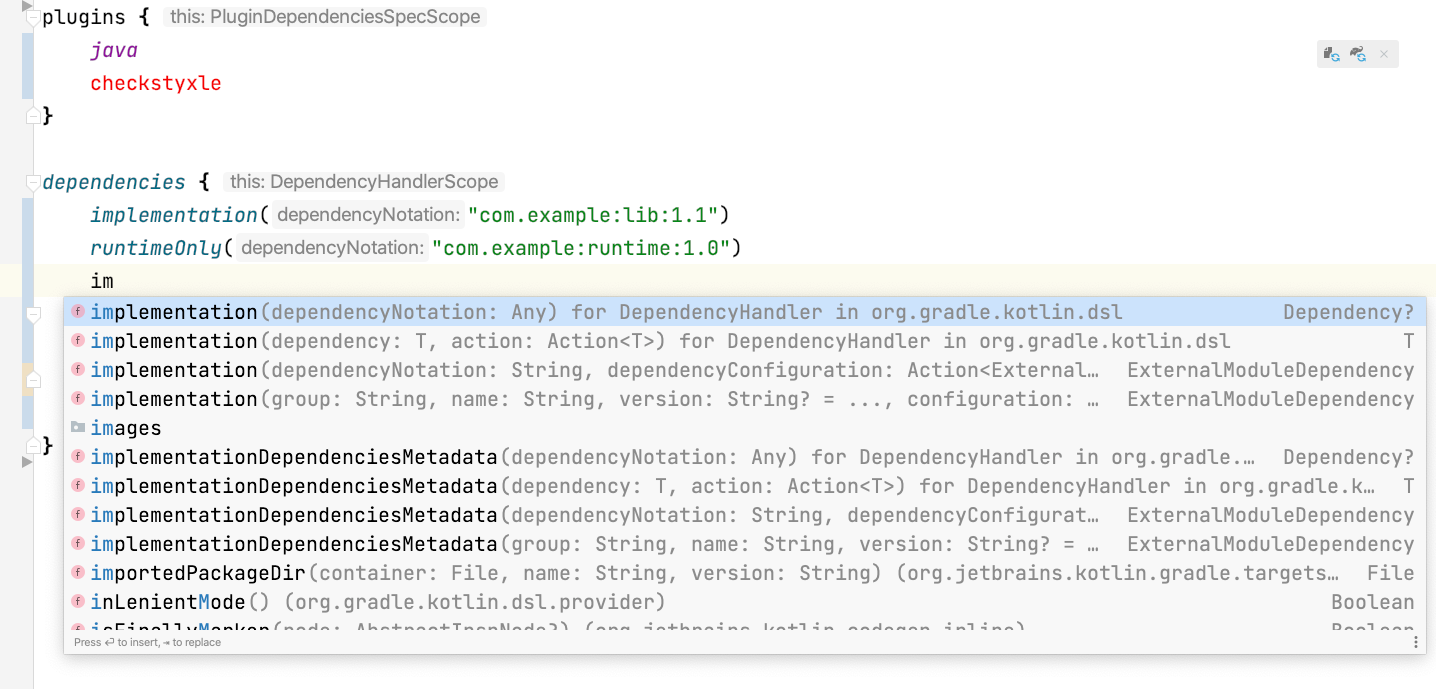
Kotlin DSL is fully statically typed; so, at every point we are given suggestions of what we can do, and if you make a typo, it is immediately marked.
The motivation behind defining Domain-Specific Languages (DSLs) is to achieve fluent grammar when describing things and actions.
DSLs revolutionized how we define views on frontend applications. I believe that the biggest game-changer was React (a JavaScript library), which allowed us to define HTML in JavaScript. However, with Kotlin DSLs we can also implement React applications in Kotlin, and we can also define HTML for backend applications in Kotlin.
// Kotlin
body {
    div {
        a("https://kotlinlang.org") {
            target = ATarget.blank
            +"Main site"
        }
    }
    +"Some content"
}
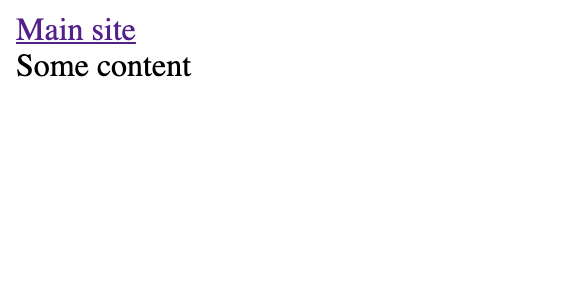
HTML view generated from the above HTML DSL.
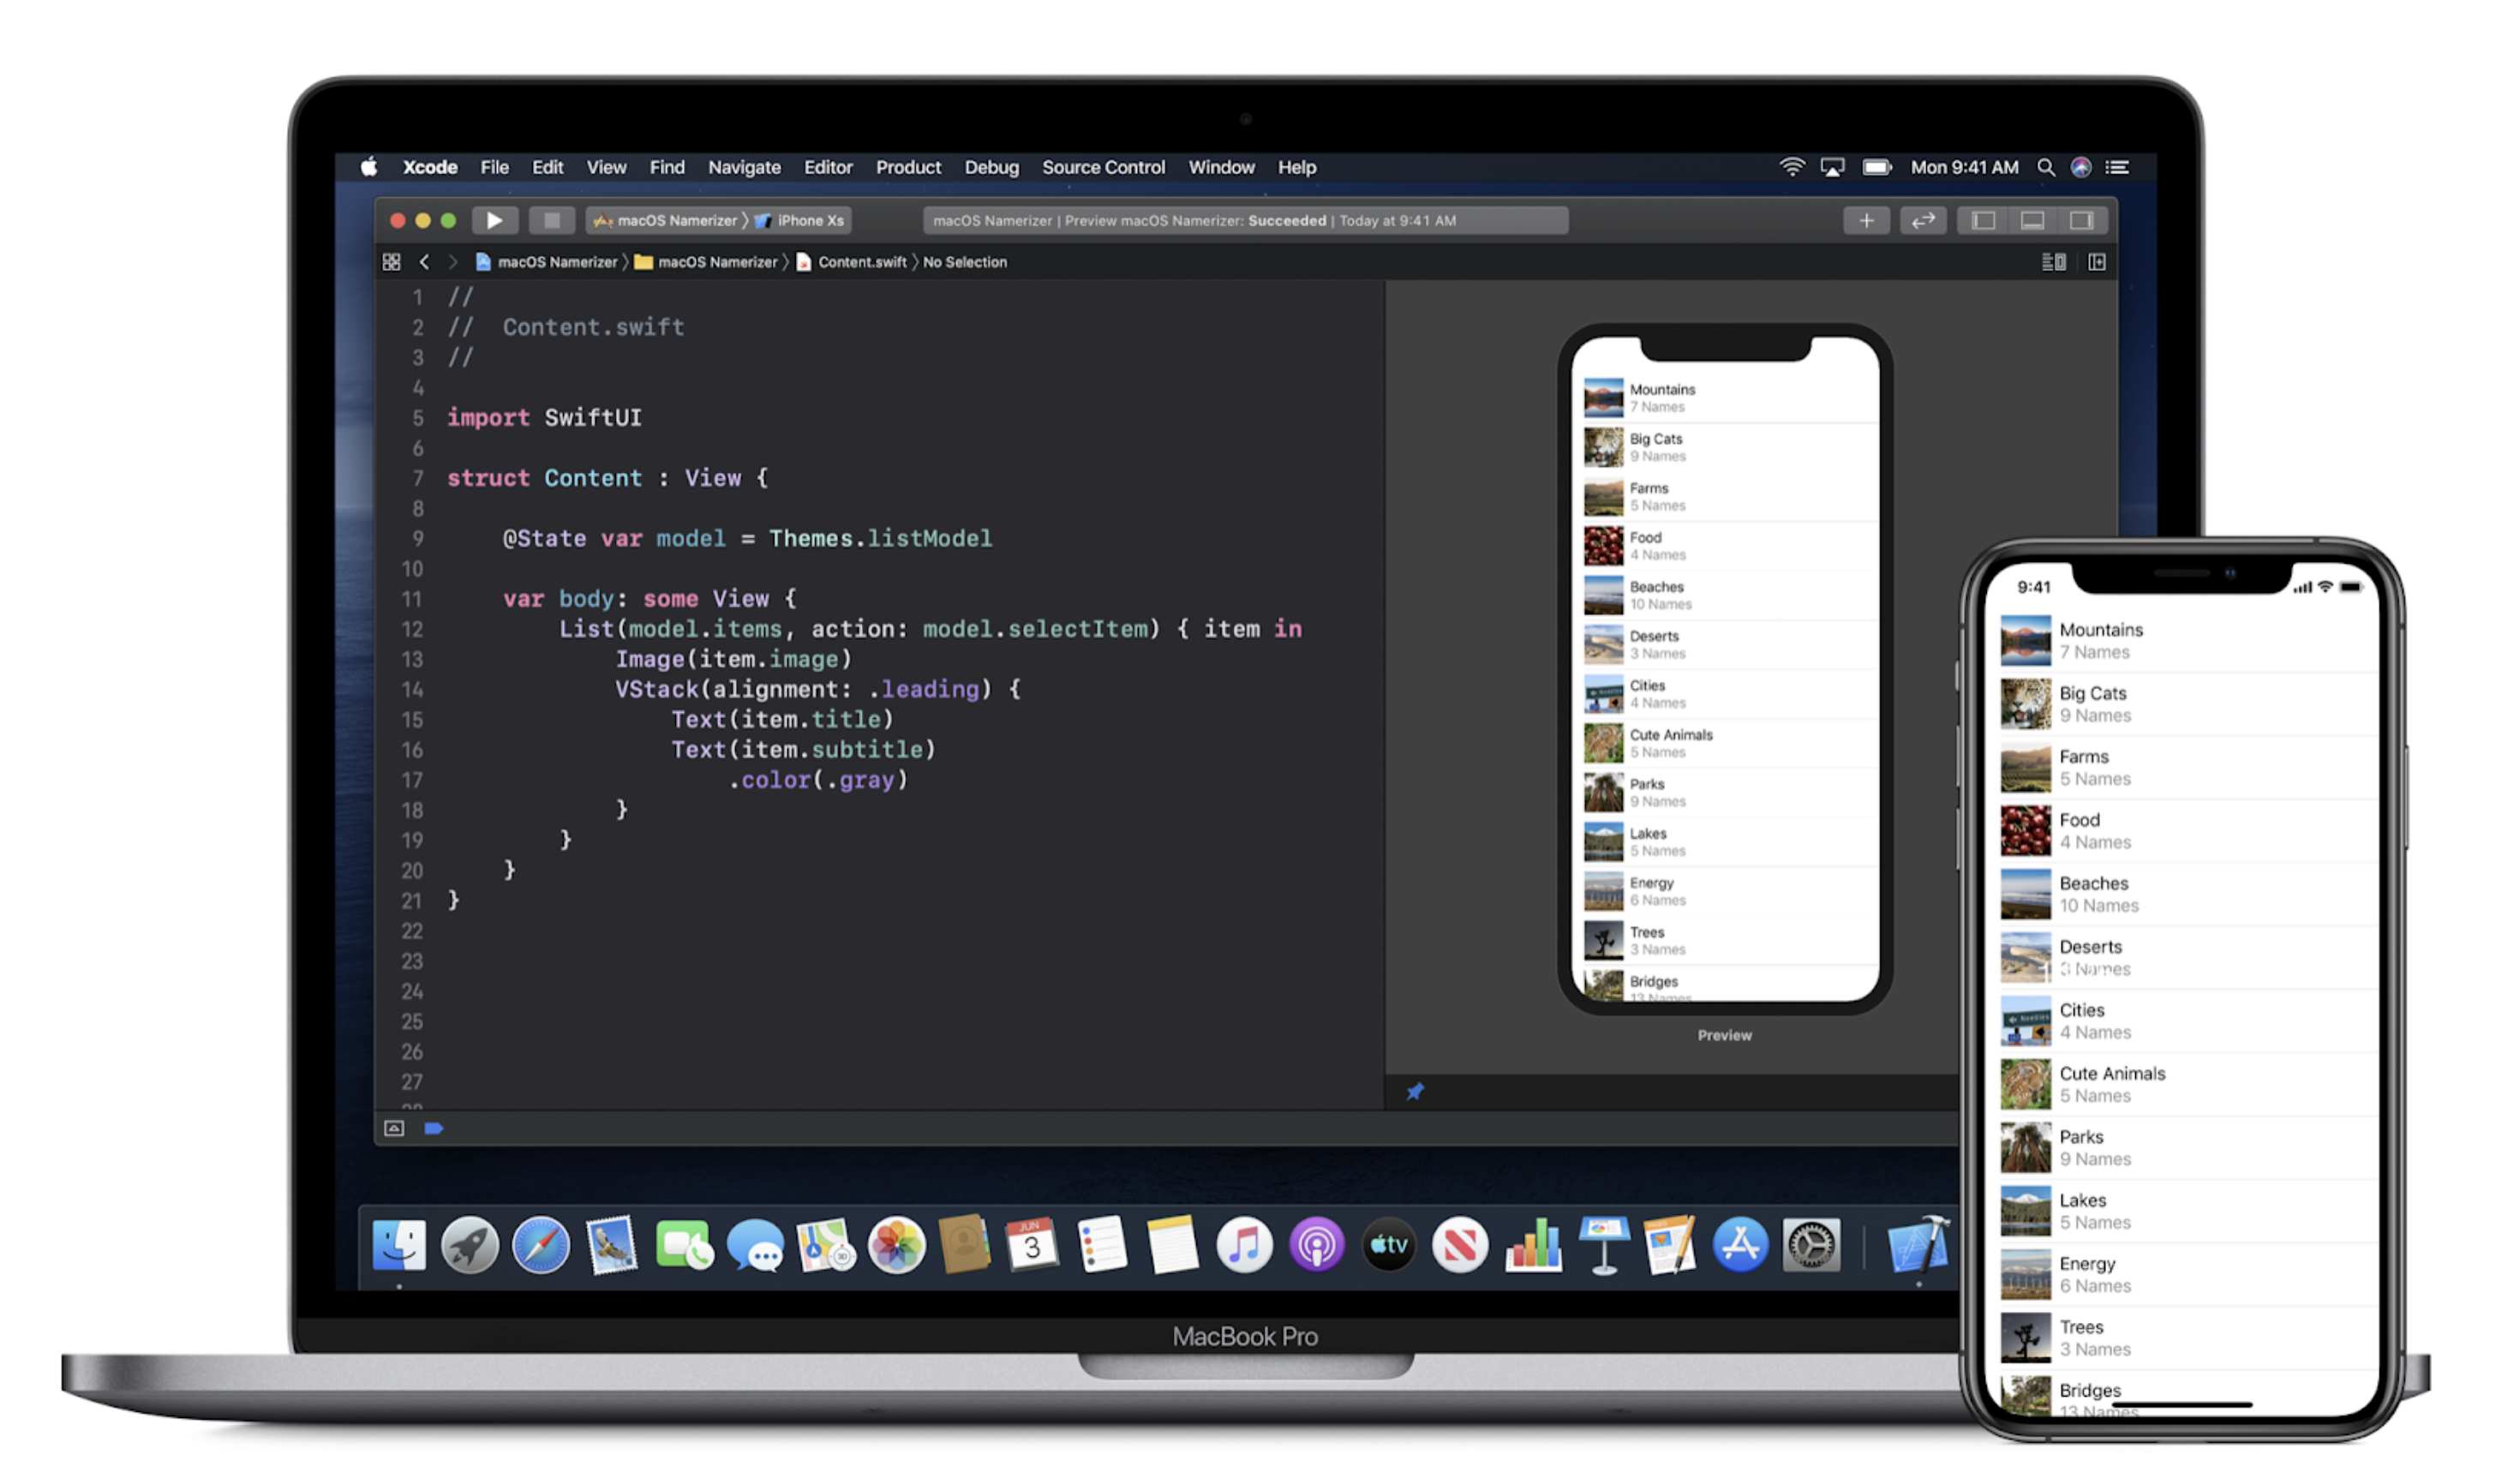
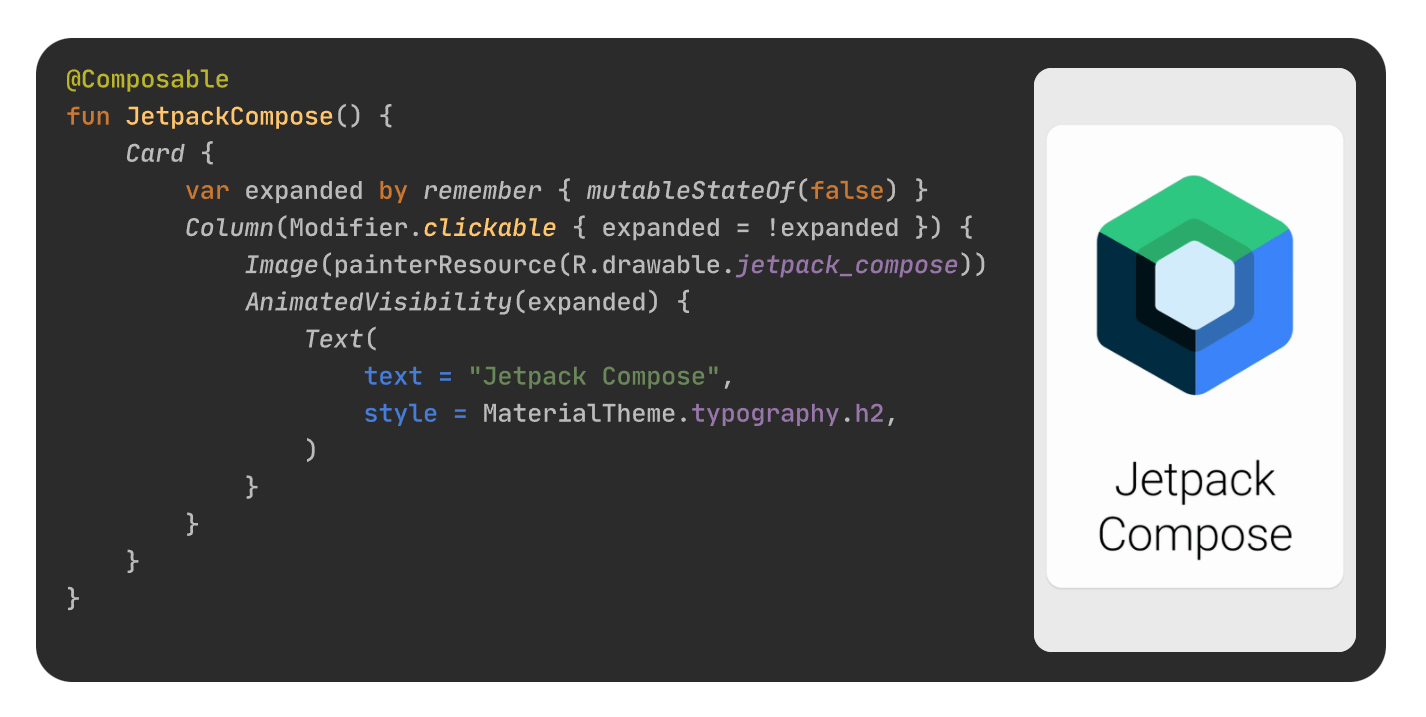
This approach also inspired other communities. At the time of writing this book, it is becoming standard practice to define iOS views using SwiftUI, which uses Swift DSL under its hood, and Android views are often defined using JetPack Compose, which uses Kotlin DSL1.
The situation with desktop applications is similar. Here is a view defined using TornadoFX, which is built on top of JavaFX:
// Kotlin
class HelloWorld : View() {
    override val root = hbox {
        label("Hello world") {
            addClass(heading)
        }

        textfield {
            promptText = "Enter your name"
        }
    }
}
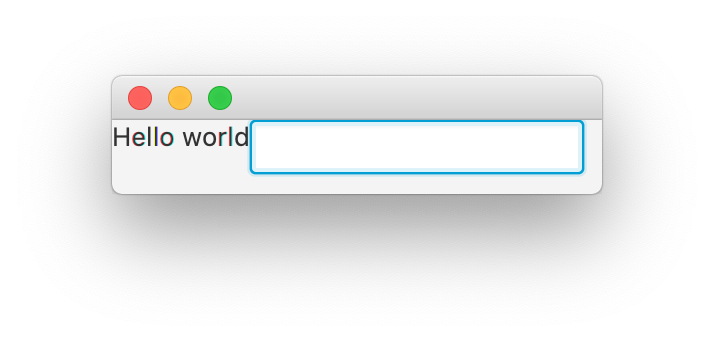
View from the above TornadoFX DSL
DSLs are also used on the backend. For example, Ktor framework API is based on Kotlin DSL. Thanks to that, endpoint definitions are simple and readable but also flexible and convenient to use.
fun Routing.api() {
    route("news") {
        get {
            val newsData = NewsUseCase.getAcceptedNews()
            call.respond(newsData)
        }
        get("propositions") {
            requireSecret()
            val newsData = NewsUseCase.getPropositions()
            call.respond(newsData)
        }
    }
    // ...
}
DSL-based frameworks are also much more elastic than annotation-based ones. For instance, you can easily define several endpoints based on a list or map.
fun Routing.setupRedirect(redirect: Map<String, String>) {
    for ((path, redirectTo) in redirect) {
        get(path) {
            call.respondRedirect(redirectTo)
        }
    }
}
DSLs are considered highly readable, so more and more libraries use DSL-styled configurations instead of builders for their configurations.

Spring security can be configured with the Kotlin DSL.
DSLs are also used by some testing libraries. This is what an example test defined in Kotlin Test looks like:
class MyTests : StringSpec({
    "length should return size of string" {
        "hello".length shouldBe 5
    }
    "startsWith should test for a prefix" {
        "world" should startWith("wor")
    }
})
As you can see, DSLs are already widespread, and there are good reasons for this. They make it easy to define even complex and hierarchical data structures. Inside these DSLs, we can use everything that Kotlin offers, and we also have useful hints. It is likely that you have already used some Kotlin DSLs, but it is also important to know how to define them yourself. Even if you don’t want to become a DSL creator, you’ll become a better user.
To understand how to make your own DSLs, it is important to understand the feature called function type with a receiver, which is a function type that represents an extension function.
I believe a good way to introduce a function type with a receiver is by starting with concepts we already know. In the Anonymous functions chapter, I explained that anonymous functions are defined like regular functions, but without names. In the same way, we can define an anonymous extension function. The result of such a function is also of a function type, but not a regular one, because it can be called in a special way: on a receiver.
// Named extension function
fun String.myPlus1(other: String) = this + other

fun main() {
    println("A".myPlus1("B")) // AB

    // Anonymous extension function assigned to a variable
    val myPlus2 = fun String.(other: String) = this + other
    println(myPlus2.invoke("A", "B")) // AB
    println(myPlus2("A", "B")) // AB
    println("A".myPlus2("B")) // AB
}
So, we have an object that represents an extension function. It needs to have a type, but this type needs to be different from a type that represents a regular function. Yes, it needs to be a function type with a receiver.
We construct function types with a receiver the same way as regular function types, but they additionally define their receiver type:
User.() -> Unit- a type representing an extension function onUserthat expects no arguments and returns nothing significant.Int.(Int) -> Int- a type representing an extension function onIntthat expects a single argument of typeIntand returnsInt.String.(String, String) -> String- a function type representing an extension function onStringthat expects two arguments of typeStringand returnsString.
The function stored in
myPlus2 is an extension function on String; it expects a single argument of type String and returns String, so its function type is String.(String) -> String.fun main() { val myPlus2: String.(String) -> String = fun String.(other: String) = this + other println(myPlus2.invoke("A", "B")) // AB println(myPlus2("A", "B")) // AB println("A".myPlus2("B")) // AB }
So, we know how to use anonymous extension functions, but now what we need is to define lambda expressions that represent extension functions. There is no special syntax for this. When a lambda expression is typed as a function type with receiver, it becomes a lambda expression with a receiver; as a result, it has an additional receiver inside its body (the
this keyword).fun main() { val myPlus3: String.(String) -> String = { other -> this + other // Inside, we can use receiver `this`, // that is of type `String` } // Here, there is no receiver, so `this` has no meaning println(myPlus3.invoke("A", "B")) // AB println(myPlus3("A", "B")) // AB println("A".myPlus3("B")) // AB }
The fact that lambda expressions with receivers change the meaning of
this can help us introduce more convenient syntax to define some object properties. Imagine that you need to deal with classic JavaBeans objects: the initialized classes are empty, so we need to set all their properties using setters. These used to be quite popular in Java, and we can still find them in a variety of libraries. As an example, let's take a look at the following dialog2 definition:class Dialog { var title: String = "" var message: String = "" var okButtonText: String = "" var okButtonHandler: () -> Unit = {} var cancelButtonText: String = "" var cancelButtonHandler: () -> Unit = {} fun show() { /*...*/ } } fun main() { val dialog = Dialog() dialog.title = "Some dialog" dialog.message = "Just accept it, ok?" dialog.okButtonText = "OK" dialog.okButtonHandler = { /*OK*/ } dialog.cancelButtonText = "Cancel" dialog.cancelButtonHandler = { /*Cancel*/ } dialog.show() }
Referencing the
dialog variable with every property we want to set is not very convenient. So, let's use a trick: if we use a lambda expression with a receiver of type Dialog, we can reference these properties implicitly because this can be used implicitly.fun main() { val dialog = Dialog() val init: Dialog.() -> Unit = { title = "Some dialog" message = "Just accept it, ok?" okButtonText = "OK" okButtonHandler = { /*OK*/ } cancelButtonText = "Cancel" cancelButtonHandler = { /*Cancel*/ } } init.invoke(dialog) dialog.show() }
The code above got a bit complicated, but we can extract the repetitive parts into a function, like
showDialog.fun showDialog(init: Dialog.() -> Unit) { val dialog = Dialog() init.invoke(dialog) dialog.show() } fun main() { showDialog { title = "Some dialog" message = "Just accept it, ok?" okButtonText = "OK" okButtonHandler = { /*OK*/ } cancelButtonText = "Cancel" cancelButtonHandler = { /*Cancel*/ } } }
Now our function that shows a dialog is minimalistic and convenient. It is easy to understand how we set each property. We also have nice suggestions inside a function type with a receiver. This is our simplest DSL example.
Instead of defining
showDialog ourselves, we could use the generic apply function, which is an extension function on any type. It helps us create and call a function type with a receiver on any object we want.// Simplified apply implementation inline fun <T> T.apply(block: T.() -> Unit): T { this.block() // same as block.invoke(this) return this }
In our case, we could just create a
Dialog, apply all modifications, and then explicitly show it.fun main() { Dialog().apply { title = "Some dialog" message = "Just accept it, ok?" okButtonText = "OK" okButtonHandler = { /*OK*/ } cancelButtonText = "Cancel" cancelButtonHandler = { /*Cancel*/ } }.show() }
This is a better solution if showing a dialog is not repetitive code for us and we do not want to define the
showDialog function. However, apply helps only in simple cases, and it is not enough for more complex multi-level object definitions.Nevertheless, we will find
apply useful for DSL definitions. We can simplify showDialog by using it to call init.fun showDialog(init: Dialog.() -> Unit) { Dialog().apply(init).show() }
Kotlin offers many simple builders for basic objects like collections or strings, that are built based on the concepts presented in this chapter. For example,
buildList is a function from Kotlin stdlib used to create a list by adding elements implicitly to receiver.fun main() { val list = buildList { add(1) add(2) add(3) } println(list) // [1, 2, 3] }
The idea is that we can call
add implicitly on the receiver, which is a MutableList. This is how this function could be implemented:fun <T> buildList(init: MutableList<T>.() -> Unit): List<T>{ val list = mutableListOf<T>() list.init() return list // or just // return mutableListOf<T>().apply(init) }
Such simple function can be really useful, especially when list elements need to be added conditionally or in a loop. For example, in the book Kotlin Essentials I present an exercise to implement function
secondsToPrettyTime, that displays time in appropriate format. One of its simplest solutions uses buildList function:fun secondsToPrettyTime(allSeconds: Int): String { if (allSeconds < 0) return "Invalid input" val hours = allSeconds / SEC_IN_HOUR val minutes = (allSeconds % SEC_IN_HOUR) / SEC_IN_MINUE val seconds = allSeconds % SEC_IN_MINUE return buildList { if (hours > 0) add("$hours h") if (minutes > 0) add("$minutes min") if (seconds > 0) add("$seconds sec") }.joinToString(separator = " ") } private const val SEC_IN_HOUR = 60 * 60 private const val SEC_IN_MINUE = 60
Another popular function is
buildString, where receiver is of type StringBuilder. It is used to create a string by appending elements implicitly to receiver.fun main() { val string = buildString { append("A") append("B") append("C") } println(string) // ABC }
In Kotlin stdlib, there are also
buildMap and buildSet functions, and external libraries offer similar functions for constructing other types of objects, so it is worth remembering this pattern.Let's say that our
Dialog has been refactored, and there is now a class that stores button properties:class Dialog { var title: String = "" var message: String = "" var okButton: Button? = null var cancelButton: Button? = null fun show() { /*...*/ } class Button { var message: String = "" var handler: () -> Unit = {} } }
Now our
showDialog is not enough because we need to create the buttons in the classic way:fun main() { showDialog { title = "Some dialog" message = "Just accept it, ok?" okButton = Dialog.Button() okButton?.message = "OK" okButton?.handler = { /*OK*/ } cancelButton = Dialog.Button() cancelButton?.message = "Cancel" cancelButton?.handler = { /*Cancel*/ } } }
However, we could apply the same trick as before, but this time to create buttons. We could make a small DSL for this.
fun makeButton(init: Dialog.Button.() -> Unit) {
    return Dialog.Button().apply(init)
}

fun main() {
    showDialog {
        title = "Some dialog"
        message = "Just accept it, ok?"
        okButton = makeButton {
            message = "OK"
            handler = { /*OK*/ }
        }
        cancelButton = makeButton {
            message = "Cancel"
            handler = { /*Cancel*/ }
        }
    }
}
This is better, but it’s still not perfect. The user of our DSL needs to know that there is a
makeButton function that is used to create a button. In general, we prefer to require users to remember as little as possible. Instead, we could make okButton and cancelButton methods inside Dialog to create buttons. Such functions are easily discoverable and their usage is really readable.class Dialog { var title: String = "" var message: String = "" private var okButton: Button? = null private var cancelButton: Button? = null fun okButton(init: Button.() -> Unit) { okButton = Button().apply(init) } fun cancelButton(init: Button.() -> Unit) { cancelButton = Button().apply(init) } fun show() { /*...*/ } class Button { var message: String = "" var handler: () -> Unit = {} } } fun showDialog(init: Dialog.() -> Unit) { Dialog().apply(init).show() } fun main() { showDialog { title = "Some dialog" message = "Just accept it, ok?" okButton { message = "OK" handler = { /*OK*/ } } cancelButton { message = "Cancel" handler = { /*Cancel*/ } } } }
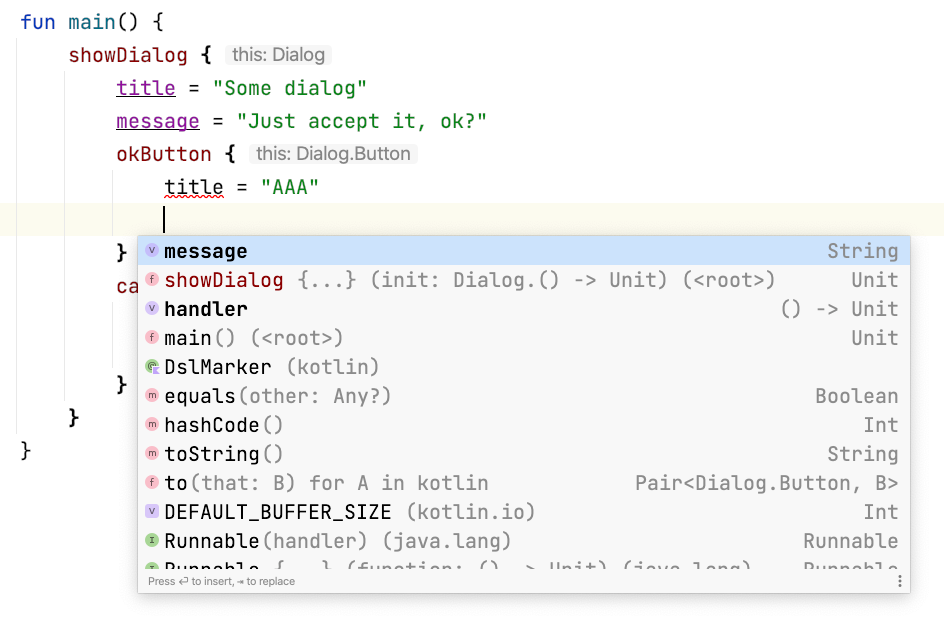
Our DSL builder for defining dialogs has one safety concern that we need to fix: by default, you can implicitly access elements from the outer receiver. In our example, this means that we can accidentally set the dialog
title inside of okButton.fun main() { showDialog { title = "Some dialog" message = "Just accept it, ok?" okButton { title = "OK" // This sets the dialog title! handler = { /*OK*/ } } cancelButton { message = "Cancel" handler = { /*Cancel*/ } } } }
This is an inconvenience because when you ask for suggestions inside
okButton, elements will be suggested that should not be used. This also makes it easy to make a mistake.
To prevent these problems, we should use the
DslMarker meta-annotation. A Meta-annotation is an annotation to an annotation class; so, to use DslMarker, we need to define our own annotation. In this case, we might call it DialogDsl. When we add this annotation before classes used in our DSL, it solves our safety problem3. When we use it to annotate builder methods, it colors those functions’ calls.@DslMarker annotation class DialogDsl @DialogDsl class Dialog { var title: String = "" var message: String = "" private var okButton: Button? = null private var cancelButton: Button? = null @DialogDsl fun okButton(init: Button.() -> Unit) { okButton = Button().apply(init) } @DialogDsl fun cancelButton(init: Button.() -> Unit) { cancelButton = Button().apply(init) } fun show() { /*...*/ } @DialogDsl class Button { var message: String = "" var handler: () -> Unit = {} } } @DialogDsl fun showDialog(init: Dialog.() -> Unit) { Dialog().apply(init).show() }
As you might notice in the above image, DSL calls now have a different color (to me, it looks like burgundy). This color should be the same no matter which computer I start this code with. At the same time, DSLs can have one of four different colors that are specified in IntelliJ, and the style is chosen based on the hash of the DSL’s annotation name. So, if you rename
DialogDsl to something else, you will most likely change the color of this DSL function call.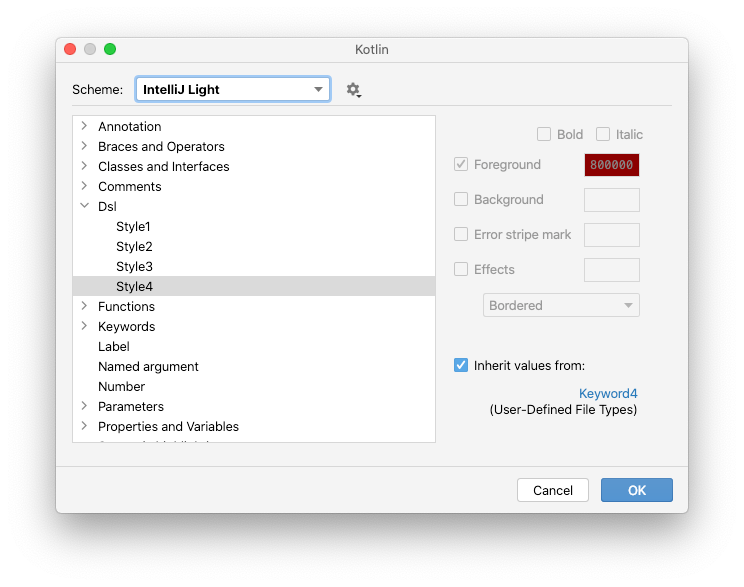
The four possible styles for DSL elements can be customized in IntelliJ IDEA.
With
DslMarker, we have a complete DSL example. Nearly all DSLs can be defined in the same way. To make sure we understand this completely, we will analyze a slightly more complicated example.Previously, we built a DSL from bottom to top, but now we will go in the other direction and start with how we want our DSL to look. We will build a simple HTML DSL that defines some HTML with a header and a body with some text elements. In the end, we would like to support the following notation:
val html = html {
    head {
        title = "My websi" +
        "te"
        style("Some CSS1")
        style("Some CSS2")
    }
    body {
        h1("Title")
        h3("Subtitle 1")
        +"Some text 1"
        h3("Subtitle 2")
        +"Some text 2"
    }
}
You can challenge yourself and try to implement it by yourself. I will start from the top, where the
html { ... } is. What is that? This is a function call with a lambda expression that is used as an argument.fun html(init: HtmlBuilder.() -> Unit): HtmlBuilder = TODO()
head and body only make sense inside html lambda expression, so they need to be called on its receiver. We will define them inside HtmlBuilder. Since they have children, they will have receivers: HeadBuilder and (my favorite) BodyBuilder.class HtmlBuilder { fun head(init: HeadBuilder.() -> Unit) { /*...*/ } fun body(init: BodyBuilder.() -> Unit) { /*...*/ } }
Inside
head, we can specify the title using a setter. So, HeadBuilder should have a title property. It also needs a function style in order to specify a style.class HeadBuilder { var title: String = "" fun style(body: String) { /*...*/ } }
The situation is similar with
body, which needs h1 and h3 methods. But what is +"Some text 1"? This is the unary plus operator on String4. It’s strange, but we need it. A plain value would not work because we need a function call to add a value to a builder. This is why it’s become so common to use the unaryPlus operator in such cases.class BodyBuilder { fun h1(text: String) { /*...*/ } fun h3(text: String) { /*...*/ } operator fun String.unaryPlus() { /*...*/ } }
With all these elements, our DSL definition shows no compilation errors; however, it’s not yet functional because the functions are still empty. We need them to store all the values somewhere. For the sake of simplicity, I will store everything in the builder we just defined.
In
HeadBuilder, I just need to store the defined styles. We will use a list.class HeadBuilder { var title: String = "" private var styles: List<String> = emptyList() fun style(body: String) { styles += body } }
In
BodyBuilder, we need to keep the elements in order, so I will store them in a list, and I will use a dedicated classes to represent each view element type.class BodyBuilder { private var elements: List<BodyElement> = emptyList() fun h1(text: String) { this.elements += H1(text) } fun h3(text: String) { this.elements += H3(text) } operator fun String.unaryPlus() { elements += Text(this) } } sealed interface BodyElement data class H1(val text: String) : BodyElement data class H3(val text: String) : BodyElement data class Text(val text: String) : BodyElement
In
head and body, we need to do the same as we previously did in makeButton. There are typically three steps:- Create an empty builder.
- Fill it with data using the
initfunction. - Store it somewhere.
So,
head could be implemented like this:fun head(init: HeadBuilder.() -> Unit) { val head = HeadBuilder() init.invoke(head) // or init(head) // or head.init() this.head = head }
This can be simplified with
apply. In head and body we store data in HtmlBuilder. In html we need to return the builder.fun html(init: HtmlBuilder.() -> Unit): HtmlBuilder { return HtmlBuilder().apply(init) } class HtmlBuilder { private var head: HeadBuilder? = null private var body: BodyBuilder? = null fun head(init: HeadBuilder.() -> Unit) { this.head = HeadBuilder().apply(init) } fun body(init: BodyBuilder.() -> Unit) { this.body = BodyBuilder().apply(init) } }
Now our builders collect all the data defined in the DSL. We can just parse it and make HTML text. Here is a complete example in which the
DslMarker and toString functions present our HTML as text.// DSL definition @DslMarker annotation class HtmlDsl @HtmlDsl fun html(init: HtmlBuilder.() -> Unit): HtmlBuilder { return HtmlBuilder().apply(init) } @HtmlDsl class HtmlBuilder { private var head: HeadBuilder? = null private var body: BodyBuilder? = null @HtmlDsl fun head(init: HeadBuilder.() -> Unit) { this.head = HeadBuilder().apply(init) } @HtmlDsl fun body(init: BodyBuilder.() -> Unit) { this.body = BodyBuilder().apply(init) } override fun toString(): String = listOfNotNull(head, body) .joinToString( separator = "", prefix = "<html>\n", postfix = "</html>", transform = { "$it\n" } ) } @HtmlDsl class HeadBuilder { var title: String = "" private var cssList: List<String> = emptyList() @HtmlDsl fun css(body: String) { cssList += body } override fun toString(): String { val css = cssList.joinToString(separator = "") { "<style>$it</style>\n" } return "<head>\n<title>$title</title>\n$css</head>" } } @HtmlDsl class BodyBuilder { private var elements: List<BodyElement> = emptyList() @HtmlDsl fun h1(text: String) { this.elements += H1(text) } @HtmlDsl fun h3(text: String) { this.elements += H3(text) } operator fun String.unaryPlus() { elements += Text(this) } override fun toString(): String { val body = elements.joinToString(separator = "\n") return "<body>\n$body\n</body>" } } sealed interface BodyElement data class H1(val text: String) : BodyElement { override fun toString(): String = "<h1>$text</h1>" } data class H3(val text: String) : BodyElement { override fun toString(): String = "<h3>$text</h3>" } data class Text(val text: String) : BodyElement { override fun toString(): String = text } // DSL usage val html = html { head { title = "My website" css("Some CSS1") css("Some CSS2") } body { h1("Title") h3("Subtitle 1") +"Some text 1" h3("Subtitle 2") +"Some text 2" } } fun main() { println(html) } /* <html> <head> <title>My website</title> <style>Some CSS1</style> <style>Some CSS2</style> </head> <body> <h1>Title</h1> <h3>Subtitle 1</h3> Some text 1 <h3>Subtitle 2</h3> Some text 2 </body> </html> */
DSLs give us a way to define information. DSLs can be used to express any kind of information you want, but it is never clear to users how exactly this information will be later used. In Jetpack Compose, Anko, TornadoFX or HTML DSL, we trust that the view will be correctly built based on our definitions, but it is often hard to track exactly how this happens. DSLs are hard to debug, and their usage might confuse developers who are not used to them. How they are defined can be a cost - in both developer confusion and performance. DSLs are overkill when we can use other simpler features instead. However, they are really useful when we need to express:
- complicated data structures,
- hierarchical structures,
- a huge amount of data.
I remember a project that needed AD campaigns configuration. It initially defined them in a YAML file, but later they transformed it into a DSL. They did that to use code to define rules for when ads should be shown. As a benefit, they gave users better suggestions and flexibility. I could see sets of campaigns defined in a for-loop. YAML files shine for simple configurations, but DSLs have much more to offer for more complex cases.
Everything can be expressed without a DSL-like structure by using builders or just constructors. DSLs are about boilerplate elimination of such structures. You should consider using a DSL when you see repeatable boilerplate code and there are no simpler Kotlin features that can help.
A Domain Specific Language is a structure that defines a special language inside a language. Kotlin has features that allow us to make type-safe, readable, and easy-to-use DSLs, which can simplify creating complex objects or hierarchies like HTML code or configurations. On the other hand, DSL implementations might be confusing or difficult for new developers, and they are hard to define. This is why they should only be used when they offer real value. This is also why they are also preferably defined in libraries rather than in applications. It is not easy to make a good DSL, but a well-defined DSL can make our project much better.
- Jetpack Compose looks a bit different than a typical Kotlin DSL because some of its elements are added under the hood by the compiler plugin, and this process is based on annotations. ↩
- A dialog (as Wikipedia explains) is a graphical control element in the form of a small window that communicates information to the user and prompts for a response. ↩
-
Concretely, when it is used as a receiver in a function type with a receiver, then it can only be used implicitly when it is the most inner receiver (so when it is an outer receiver, it needs to be used with an explicit
this@label). ↩ - Operators are better described in Kotlin Essentials, Operators chapter. ↩